Friday, March 1, 2013

je t'aime "pseudo screen print" onesie- TUTORIAL

I'm loving this little onesie I made today for my niece! 


While trying to brainstorm a unique idea, I remembered the set of 10 ja t'aime cards/envelopes I picked up at Target for $3. 

So, I scanned it and saved the image as a 5"x7" document and printed it directly onto white cotton fabric. I used heat 'n bond to apply to the onesie. 

Want to try it? 
Gather the following supplies-
distilled white vinegar and baking soda (to make own ink fixative) 
fabric-I used an old 100% cotton pillowcase
ink-jet printer 
5"x7" cardstock (I trimeed an old greeting card to size)
spray adhesive
Heat 'n Bond 
Onesie or T-shirt
needle and thread (optional)


TUTORIAL
(1) Find your image and save to size desired
(2) Apply pre-treated fabric with spray adhesive to cardstock; make sure edges are secure
(3) Print image and cross fingers it goes through the first time ;)


(4) Iron Heat 'n Bond to wrong side of printed cloth according to instructions
(5) Trim around image
(6) Iron printed cloth to onesie according to Heat 'n Bond instructions
(7) Hand stitch or use sewing machine to help secure the fabric and/or to add detail/ color (I used black thread)-optional


Friday, October 5, 2012

FREE Disney Character Stencils

As you're thinking about carving pumpkins, you may be thinking about doing something a bit different this year. You can buy carving kits with unique stencils, but I found a friendly collection of Disney character stencils on the Disney Family Fun magazine website-perfect for pumpkin carving-AND freezer paper stenciling. Click here to see all of the great choices. You'll find princesses, Mickey Mouse & friends, Phineas, Perry, Tinkerbell, Lightning McQueen...

Here is a great tutorial for freezer paper stenciling from SallyJShim blog.


Wednesday, April 25, 2012

Natural/ Safe Ways to Repel Ants

Natural Ant Repellent 


You can use cinnamon, chili powder, cayenne pepper, black pepper, cloves and bay leaves. Sprinkle the powders where the ants are coming inside and where they tend to congregate. You can mix the chili powder with water to make a paste if you find the powder alone to be ineffective, this can concentrate its deterring power.

Ants don't like the smell of cloves or bay leaves, so put these along their trail, at the entrance or around the kitchen to keep the ants out as well. Even mint oil, or an unwrapped stick of mint gum, could chase the ants back out the door.

Another option is to put apple cider vinegar or white vinegar in a spray bottle either full strength or diluted, and spray the ant entrance and affected areas. You may have to experiment with various concentrations of the vinegar water solution to get it right for your area. The smell will go away pretty quickly for you but will last longer for the ants. Use a fine mist and you don't have to wipe it up, which can help it to be more potent for the insects.


Source: http://answers.yahoo.com/question/index?qid=20120410084203AAenCjw


Natural "Ant Traps"


¼ cup of sugar
¼ cup of baking yeast
½ cup of molasses
6 index cards or can lids
Simply mix the sugar, yeast and molasses together. Smear them on the index cards or any lid. Put these sticky sides up in the high traffic areas of the ants. Its sticky, its natural and it traps them.
Look to see where the ants are coming in and wash the area with straight white vinegar. Something about the vinegar seems to repel the ants.Let it dry.
There are many natural ways to repel pests like fleas, moths and ants. They are safer on the environment and for the most part worry free.
Source: http://voices.yahoo.com/natural-ways-repel-ants-moths-fleas-679246.html?cat=7

Wednesday, March 28, 2012

A Few of My Favorite Sewing Projects from 2011

Ruffle Capris, using Jocole pattern

Toile dishtowel up-cycled into an A-line skirt 

Wannabe Matilda Jane Ruffle Pants, made using Carla C Easy Fit pants pattern

Knot Apron dress (without apron), using Little Lizard King knot apron dress pattern 


Knot Dress, made from woman's sundress, using Little Lizard King Knot Apron dress pattern
Knit Ruffle pants using Jocole knit ruffle pants pattern


Monday, January 9, 2012

La Petite Mercerie Fabric Giveaway

Visit Allfreesewing.com, a great website full of free patterns and tutorials for sewers and craft junkies. They are holding a fabric giveaway! To enter, visit here.

Here's a little info about the La Petite Mercerie Fabric line-Based on difference cross stitch designs, designer Emmanuelle Carre created the lovely La Petite Mercerie fabric line in 2010. This fabric line is perfect for creating patchwork quilts, sewing projects and anything in-between. With muted blues, browns and reds, the fabric delivers fun designs without colors too bright to mix and match. La Petite Mercerie incorporates images of sewing notions, alphabetical letters and stripes. Printed by the Lecien Corporation, the fabric is made of fine quality cotton. Create the sewing and quilting projects you’ve always dreamed of with the charming La Petite Mercerie fabric line. 


I love these fabrics! 

Saturday, September 24, 2011

Copy Cat- Matilda Jane ruffle pants


I've been 'filing' ideas for clothes for the girls on my pinterest board. I finally got around to attempting a look-alike pair of Matilda Jane Ruffle Pants. I just think they're darling. This pair is not outrageously priced, but I still wanted to at least try making a pair.


Inspiration
These adorable Matilda Jane Herringbone Ruffle Pants

I found a light blue version of this fabric and attempted to make them myself-combining components of two different pants patterns.


The Mindy Lou version ;) 


The Review: Required a lot of patience, but it was all worth it when Ava tried them on and looked cute as a button, leaping and twirling like the free spirit she is!


Wednesday, September 21, 2011

Super Silly Simple DIY Ribbon Wand

My oldest has been making homemade 'ribbon' wands by tying dish towels and pillowcases to an old toy plastic golf club handle. While I appreciate her creativity for improvising, I'm tired of continually washing dish towels that aren't really being used.... so, I figured I'd surprise her with a 'real' ribbon wand...  ;)


She looks proud, doesn't she?

Want to make your own? I had everything on hand, so this project was FREE.

Here's what you need-

1 tree branch, approximately 12" length, and 1/4" diameter (on hand or borrow from a neighbor)-free
screw eye (on hand or available at hardware store in picture hanging kit)-$1.50
ribbon, approximately 5 ft. (fabric would work too) (on hand or craft store)-$1.50
Total Cost: Free or $1.00 (considering cost/ item used for 1 wand)

1. Find a branch that's 1/4" to 1/2" in diameter. Cut to 12" in length.


2. Sand edges to create flat surface. 
3. Carefully screw the eye hook into one of the edges.


4. Twist end of ribbon and string through the eye hook. Tie and knot again to secure.

The Review: It's nothing fancy (maybe even a bit tacky), but it's for my little 5-yr old. She could honestly care less about what it looks like.

You can find a great tutorial here on how to make ribbon wands with dowels. They recommend them as guest gifts at weddings!

Tuesday, August 16, 2011

Toile Dish Towel Skirt

I made this skirt based on the tutorial for tea towel skirts that I found on the Dollar Store Crafts blog. I created the pattern by outlining one of Elyse's current skirts. It was quite simple to make, because I used the finished hem on one side. I needed to hem only one side of the skirt to keep the pattern upright. And it was easy to sew casing at top to run elastic through. For detailed instructions, click here for a tutorial to make a skirt out of cloth napkins. 


The Ava Top-made with love by mommy

I wanted to challenge myself to make something completely from scratch, creating my own pattern. I had the perfect fabric for my attempt at a loose fitting top for Ava.


How I made it:

(1) created pattern by tracing a loose fitted top by folding shirt in half, allowing a good 1" seam allowance on all sides (advanced sewers usually need only 3/8")

(2) folded fabric and traced the pattern against the fold -cut two pieces

(3) Turned right sides together, pinned in place then stitched the seam armpit to length of shirt, using straight stitch. Later reinforced seam with zig zag.

(4) Then, stitched the sleeves and collar.
*At this point, I had Ava try on the shirt. The bodice fit fine but the arms were way too snug.. :( So, I thought I'd cut seam 5" from edge of sleeves,to create an open flare-like sleeve, then stitched either side, creating an outward 'V'.

(5) I stitched a hem at the bottom, then decided to add a pull tie to the bottom. So I folded it up one more time to allow room to pull a tie through. I used some turquoise ribbon trim from an old pair of PJ's.

The review: a nice feeling of accomplishment. I love the fabric, and Ava loves the shirt! (yay!) If I make another shirt, I will sew the sleeves separately, making sure they are the size and shape I want them. Plus, I think it will be easier to try a different style of sleeve. I would also use a softer cotton fabric.

Friday, July 8, 2011

Upcycled knit shirt into ruffle capris

Thanks to my sister-in-law, I acquired a long-sleeved knit navy shirt. The front side had a screen print, but there was just enough fabric on the back side of the shirt to make a size 2T ruffle pant, from the pattern I downloaded on youcanmakethis.com. It's a Jocole pattern with multiple sizes for these everyday ruffle knit pants. 


Here's go-around 2-I made a pair of capri (without the ruffles) for my 5-yr old daughter. If I do it again, I'll need to enlarge the pattern slightly, since she's more of a size 6.

I cut the length so the natural hem of the shirt would be on the pant. Worked out great! Happy with how they turned out. I'm having such fun making these clothes for my girls!

Thursday, June 23, 2011

Shuffle for Ruffle


I'm SO excited. I actually danced after my first attempt at ruffle pants actually turned out-well they turned into capris. But, I still think they look adorable on Elyse. I followed a pattern I purchased from youcanmakethis.com. It's an awesome site with a variety of patterns available to purchase. You can even download some free ones! Great for starters-like me. The patterns include step-by-step tutorials, which have really helped me.


LOVE the ruffles and am now making some pants for my 5-yr old, Ava. Will post pics-hopefully soon.

Tuesday, June 14, 2011

Put a Label On It! (no fabric paper or Bubble Jet Set required)


UPDATE 4/5/12: Still looks good as new after many washes in cold water and bleach-free detergent!

I wanted to start putting size tags on the clothing I've been making for my friends' children. I found various websites that you can order from, but I didn't need that many and didn't want to spend too much money on the fabric paper. After some online research, I tried freezer paper technique and a solution of some household items.

You could also design a fun larger image and sew it to a T-shirt, tote or blanket, etc.


Want to try it? Here's what you need-


what you need: 
ink fixative to pretreat fabric to prevent ink from washing out (or make your own-see below)
cake pan for soaking fabric
ink jet printer
freezer paper
fabric (100% cotton works best)
piece of regular copy paper- 8-1/2" x 11"
computer program to design- I just used Word so nothing too fancy is required
iron-cotton setting
glue stick


(1) Select your fabric. I found 100% cotton fabric works best. I used an old pillowcase. I'm going to try using some flour sack towels I found at the Dollar Tree. (UPDATE 4/5/12: flour sack towels worked great and were very affordable)

(2) Pretreat your fabric with an ink fixative to help prevent the ink from washing out. I made my own.

I found a site that said you could use a fabric softener solution  here
I didn't have any liquid fabric softener, but I found a 'recipe' to make homemade fabric softener solution here

I just wanted to try it out, so I cut back the recipe to 1/4.

1/4 c baking soda
add 1-1/2 cup distilled white vinegar
4 c water

(3) Lay pieces of fabric (each approximately 8-1/2" x 11") and soak a few minutes, then allow to dry completely. (I put mine in the dryer for a bit too. Could also try a hairdryer.) You could also try putting the solution in a spray bottle. Spray onto the fabric and just make sure to spread the solution across the surface of the fabric. 

(4)  Gently iron dry fabric. (Make sure fabric is completely dry or you will get water spots...like I did the first time... :-(

(5) Right side of fabric down, iron freezer paper to adhere to fabric (smooth, shiny side down onto fabric). Allow to cool a few minutes.

(6) Use glue stick to apply freezer paper onto copy paper. Make sure to glue down the corners, so it doesn't get caught in the printer. No fabric or freezer paper should fall outside of the copy paper.

(7) Test your image. Print your image onto a regular piece of paper to make sure it's spaced right.

(8) If all looks good, run your fabric paper through. Do not touch ink. Allow ink to dry for 10 minutes.

(9) Peel off freezer paper. Place a cheese cloth/ dishtowel on top of fabric, and set ink with iron. Iron over images about 20 seconds. Allow fabric to cool.

(10) Run fabric gently under cold tap water. Gently wipe with your fingers to make sure ink will not smear. Do not wring the fabric. Dry with paper towels. Use hairdryer to speed up drying time.

(11) Cut your images out and sew to your creations for a professional, unique touch. Wash garment on cold, gentle cycle. The subtle vinegar smell will go away after first wash.

Would love to see your labels (which will be much more creative than mine). Please share pics!


Click here for a great tutorial using purchased fabric paper. I incorporated some of these steps in my version.

Monday, June 6, 2011

Something Blue

I wish I had the 'before' pic, but I don't. I'll have to just describe it-the top and base were painted dark green and the rest of it was an antique white. Paintings of flowers covered the drawers. It wasn't bad, but it just wasn't my style.

So, with a fresh coat of leftover wall paint, acrylic paint and fabric for the knobs (applied using good ol' Mod Podge), I brightened it up! I just love these colors together! Something blue accented with a touch of red!

Monday, May 2, 2011

Sew far, pretty good

This week I've been obsessed with teaching myself to sew. I accomplished several projects, getting my inspiration from many creative, experienced and talented bloggers.

(1) First project: Update plain white T by adding ruffles 

kind of liked this shirt, but too much ruffle for me


so here's how my ruffled t-shirt turned out (cut up one of the hub's old torn t-shirts for the ruffles...thanks hon...)
used basting stitch to ruffle, then a backstitch to secure the ruffles to the shirt
I found a great tutorial here.


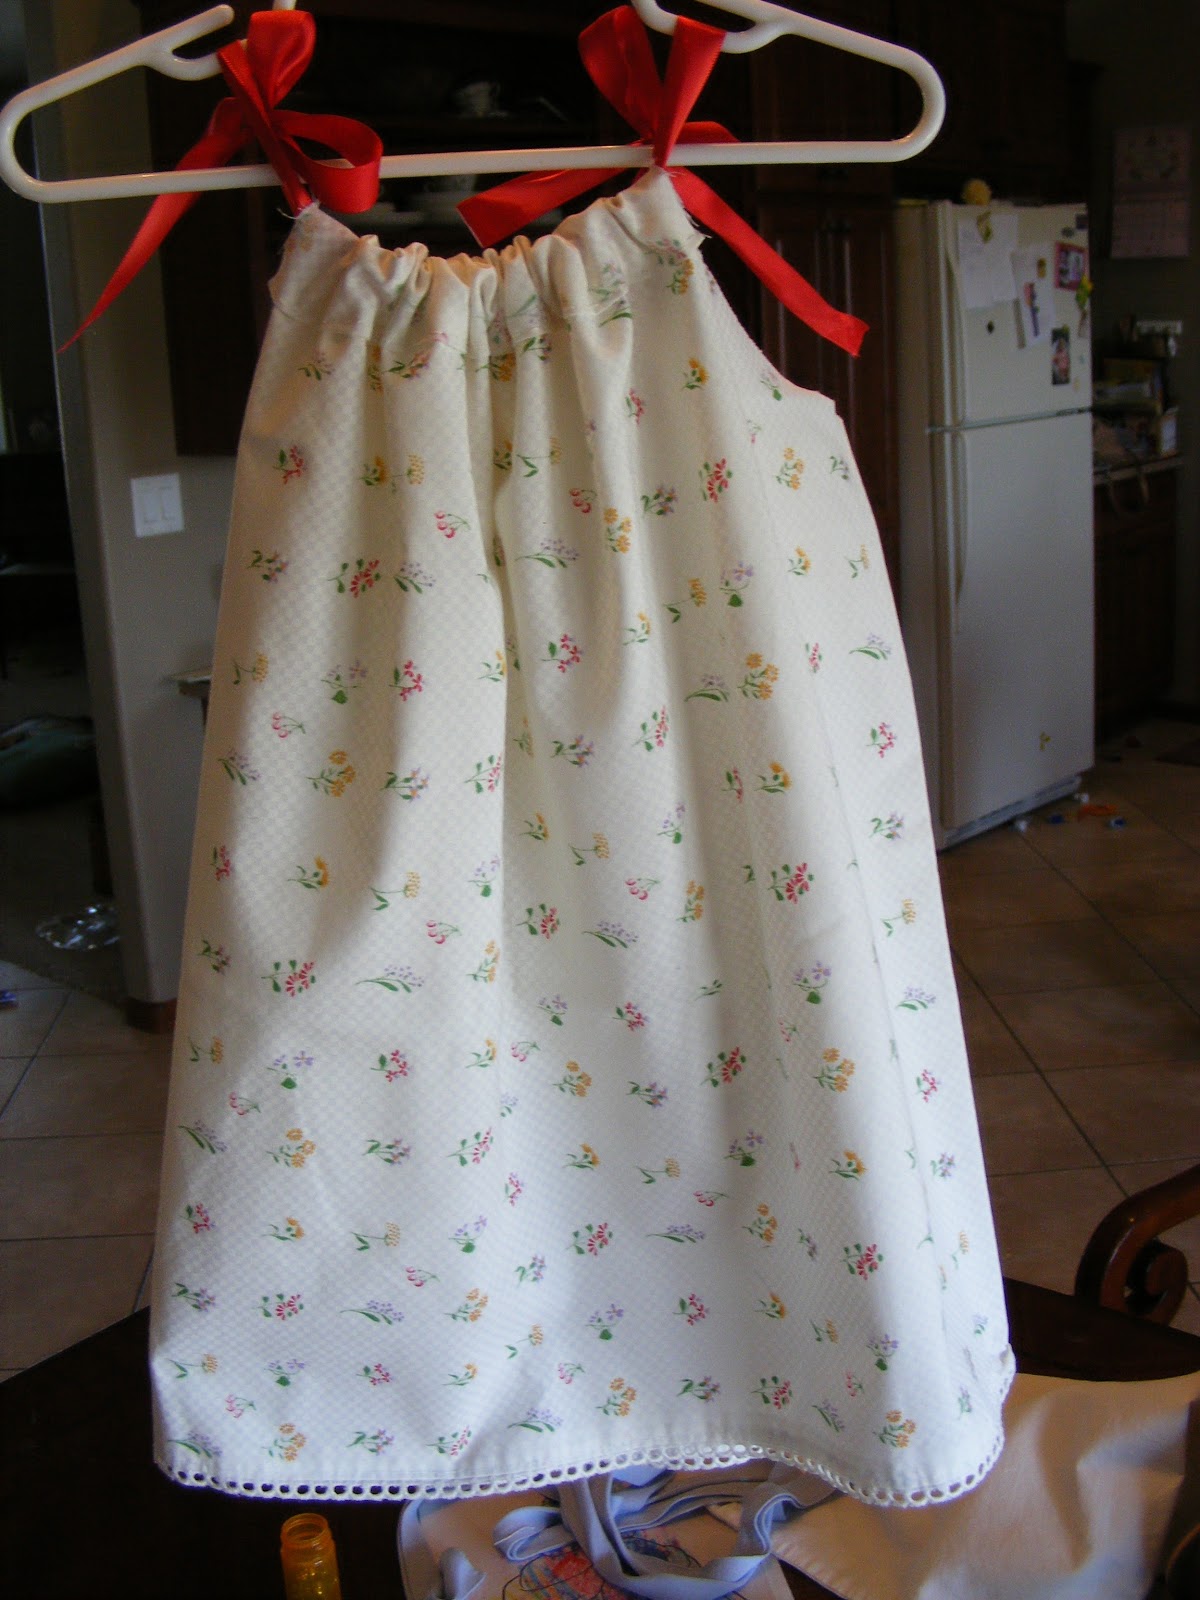
(2) Next project: pillowcase dress

I ran across many tutorials but they were a bit overwhelming and time consuming for the beginning sewer. This video inspired me to give it a shot. I was fortunate to have some beautiful embroidered pillowcases that were handed down to us.


my VERY first pillowcase dress-used an old hospital pillowcase


the review: Such fun projects. One needs to be patient if hand-sewing (like me)....but I felt like I had accomplished something as a newbie sewer! Yay me! ;)


and project coming up.....
another ruffle T-shirt using flour sack towels from Dollar Tree.... Not sure when I'll have the time. But we shall see how that one turns out.... ;)


Wednesday, April 27, 2011

DIY Jewelry Organizer

Looking for something to neatly hang all of your bracelets and necklaces? Here's what I came up with.


if you want to try it, here's what you'll need-
foam board
Mod Podge (I used matte)
small brush
old picture frame with glass removed (I painted my old wooden frame with red acrylic paint)
scrapbook paper
screw-in hooks
drawer pulls with screws (or washers to help create a flat surface)
super glue (I used Elmer's Stix-All)

diy instructions-
(1) Carefully remove the glass from your frame,
(2) Trace the frame's cardboard backing onto a piece of foam board (I bought mine at Dollar Tree)
(3) Apply a medium layer of Mod Podge to the back side of your scrapbook paper (measured to fit your frame).
(4) Apply Mod Podge to the foam board and press paper over the board. Spread the paper down, making sure there are no wrinkles. Allow paper to dry for 15-20 minutes.
(5) Brush on a second layer of Mod Podge over the paper to seal it. Allow Mod Podge to dry completely.
(6) Push in several small screw-in hooks into the board, turn to tighten. Make sure they're not poking out of the back-they are a bit sharp. (I just covered them with poster putty.)
(7) Place the foam board back into the frame.
(8) Secure the drawer pulls to the bottom of the frame. (I ended up using super glue but needed to glue a washer to each to make a flat surface first to make a flat surface that would better stick to the frame.) Allow glue to dry.
(9) Hang your jewelry

*note: the fabric in the upper-left covers a magnet. I use that for my magnabilities magnets that go with the copper bracelet you see hanging.

The Review: Not too difficult. I had everything on hand except for the foam board. You could use fabric in place of the paper. You may be able to push earrings through the foam board too. 

Saturday, April 16, 2011

Pillow Fight

Slowly, our living room is coming to life. Brown on brown on brown can get a bit tiring, but as I'm finding on many blogs it's so easy to add a personal touch with fabric and some unexpected color. I can't paint now, so....

here's what I did:

(1) jazzed up the floor lamp with some fabric (as you can see here)
(2) dressed up a bare wall with fabric covered canvases and one with scrapbook paper that needs a bit more hot glue. (I'm going to add two more canvases-the wall still looks a little bare to me.)
(3) tossed two bright greenish-blue pillows on the couch that complemented the colors in the canvases. Then, took it a step further because I had some extra energy from a late night cup of coffee and made rosettes out of remaining fabric and secured them to the pillows (with fabric glue, because I can't sew.) The pillows are rather cozy and great for pillow fights among a mom and her two little girls! We'll see how long those pretty little rosettes can stay on.


Here's the before (with the new pillows):


after:


Don't you just love that table? My dad built it for me about 10 years ago. It's so near and dear to my heart.

Friday, April 15, 2011

Shadow Box Training

I'm not so sure about this one, and I'm rather embarrassed to share pictures with you, but perhaps it will inspire you to do something similar but MUCH, MUCH better and more creative.... I'm more or less attempting to train myself through much trial and error... but it's oh so fun!

anyway, there's a story behind this experimental project....

I was starting to smash down a surplus microwave popcorn box for the recycling bin and started reminiscing about growing up and watching movies on the big ol' box TV with my family and enjoying popcorn from the air popcorn popper.  Box TVs. .....then for some odd reason, a shadow box picture frame came to mind. Maybe I could make that box into a picture frame??

Here's the lovely box-before I 'shadowboxed' it... ???


First, I flattened the box and painted it. I tried the crackle effect (white acrylic, glue, red acrylic, blow dry), but really wish I just spray painted it red (although the weather is too dang cold for that!)


After the paint was dry, I turned the box over and used Mod Podge to apply a fun wrapping paper. This would be the inside of the shadow box. (Wallpaper or fabric would probably work better. This was kind of a trial and error project...) I applied a thin layer of Mod Podge over the top to seal. Allow to dry.


Next, I used the good ol' hot glue gun (high heat) to reassemble the box, keeping the wrapping paper to the inside of the box.

For now, I set it on top of my kitchen cabinet. I'll give it some time to see how I like it. I could use one of those velcro picture hanging things if I want to put it on the wall later, with a black and white picture. If that doesn't work, the box is just wide enough for file folders, so I can always use it in the office. :) I just hate to see those cardboard boxes go to waste.


The Review: I'd like to try it again but will paint the outside a solid color (preferably using spray paint when weather warms up). Next time, I'll either use wallpaper or paint the inside of the box a solid color. (I'll also make sure to disguise the seam at the back of the box).

Wednesday, April 13, 2011

Recycled Crackled Cracker Box Book

I'm still on a mission to master a quality crackle technique. I decided to try a cardboard surface, as the cover for my first attempt at a homemade book. The final book:


I was very happy with how the cover turned out!


How to make the crackled finish cover: 
(1) Dismantle cereal, cracker, etc. cardboard box, cut off flaps and lay flat (printed side up).


(2) Apply generous drops of acrylic paint (I used light purple), spread to cover the print, then allow to dry.


(3) Apply generous drops of Elmers Glue-All, then spread to cover painted surface with a thick layer of glue.


(4) While glue is still wet and tacky, apply a second color of acrylic paint (I used white). Immediately blow dry the surface with a hair dryer.

Here's the result....


To make the rest of the book, refer to the step-by-step instructions, along with helpful pictures at cutoutandkeep.net.

The Review: Fun and easy. Just takes some organization.

Other Ideas: Cover the cardboard with anything- scrapbook paper, wallpaper, chalkboard paint, kids' artwork. In place of plain white paper, you could use a heavy card stock sprayed with chalkboard paint or dry eraser paint. Great activity book for kids. Plus, they could decorate the cover themselves-keeping them occupied while you have some time to yourself. There's no such thing as perfect. It's the story behind it that counts (and the fun you have making it). And you can't always judge a book by its cover, right? Have fun!